
Key Takeaways
Polystyrene hives offer superior insulation, keeping bees warmer in winter and cooler in summer.
These hives are lightweight, making them easier to handle and move compared to traditional wooden hives.
Polystyrene hives require less maintenance and are more resistant to pests and diseases.
Proper site selection and setup are crucial for the success of your polystyrene hive.
Regular inspections and seasonal maintenance can significantly improve the health and productivity of your hive.
Introduction to Polystyrene Hives

“8/9 Frame Lyson Polystyrene Hive Kit …” from workerandhive.com
Polystyrene hives are becoming increasingly popular among beekeepers, and for good reason. These hives, made from high-density polystyrene, offer several advantages over traditional wooden hives. Not only are they more thermally efficient, but they are also lightweight and easier to handle. If you’re considering starting a rooftop beekeeping venture, polystyrene hives could be your best bet.
In this guide, I’ll walk you through everything you need to know about polystyrene hives, from setting them up to maintaining them throughout the year. By the end of this article, you’ll be well-equipped to make the most of your rooftop beekeeping experience.
What Makes Polystyrene Hives Unique?
Material Advantages and Disadvantages
Polystyrene hives are crafted from high-density polystyrene, a material known for its excellent insulation properties. This means that these hives can keep your bees warmer in the winter and cooler in the summer, providing a more stable environment for your colony.
Advantages:
Superior insulation
Lightweight and easy to handle
Durable and long-lasting
Resistant to pests and diseases
Disadvantages:
Can be more expensive initially
May require additional care to prevent damage from UV exposure
Comparison with Traditional Wooden Hives

When comparing polystyrene hives to traditional wooden hives, several key differences stand out. While wooden hives have been the standard for many years, polystyrene hives offer several benefits that make them worth considering.
|
Feature |
Polystyrene Hives |
Wooden Hives |
|---|---|---|
|
Insulation |
High |
Moderate |
|
Weight |
Light |
Heavy |
|
Durability |
Long-lasting |
Prone to rot and pests |
|
Maintenance |
Low |
High |
|
Cost |
Higher initial cost |
Lower initial cost |
Thermal Performance and Insulation Benefits
One of the standout features of polystyrene hives is their thermal performance. Because of the material’s excellent insulation properties, these hives maintain a more consistent internal temperature. This is crucial for the health and productivity of your bees, as temperature fluctuations can stress the colony.
Besides that, better insulation means your bees will require less energy to maintain the hive’s internal temperature. This can lead to higher honey production and a healthier colony overall. In colder climates, polystyrene hives can significantly improve overwintering survival rates, making them an excellent choice for beekeepers in these areas.
Setting Up Your Polystyrene Hive
Site Selection: Essential Criteria
Choosing the right location for your polystyrene hive is crucial. The site should be well-drained, receive plenty of sunlight, and be sheltered from strong winds. Additionally, you’ll want to ensure that the hive is easily accessible for regular inspections and maintenance.
Sunlight: Position your hive so it receives morning sunlight. This helps to warm up the hive early in the day, encouraging bees to start foraging sooner.
Shelter: Place the hive in a location protected from strong winds. This can be near a wall or fence that acts as a windbreak.
Accessibility: Ensure you have easy access to the hive for inspections and maintenance tasks. A clear path to the hive is essential.
Assembly Instructions: From Unboxing to Ready-to-Use
Assembling a polystyrene hive is straightforward, but it’s essential to follow the instructions carefully to ensure everything fits together correctly. Most polystyrene hives come with detailed assembly guides, but here are some general steps to get you started:
Unbox the Hive: Carefully remove all components from the packaging and check for any damage or missing parts.
Assemble the Base: Start by assembling the hive’s base. This usually involves snapping or screwing the base pieces together.
Attach the Brood Box: Once the base is assembled, attach the brood box. Ensure it is securely fastened to the base.
Add the Supers: Depending on the hive model, you may need to add one or more supers. These are the boxes where the bees will store honey.
Install the Frames: Place the frames inside the brood box and supers. These frames will hold the honeycomb.
Secure the Lid: Finally, secure the lid on top of the hive. Ensure it fits snugly to protect the bees from the elements.
Initial Colony Transfer Tips
Transferring a colony to your new polystyrene hive can be a delicate process. It’s essential to do this carefully to minimize stress on the bees. Here are some tips to help you with the transfer:
Choose the Right Time: The best time to transfer a colony is during the warmer months when the bees are active. Avoid transferring during cold or rainy weather.
Use a Smoker: A smoker can help calm the bees during the transfer. Use it sparingly to avoid over-stressing the colony.
Handle Gently: Be as gentle as possible when handling the frames and bees. Sudden movements can agitate the colony.
Check for the Queen: Ensure the queen is transferred to the new hive. The colony cannot survive without her.
Most importantly, take your time during the transfer. Rushing can lead to mistakes and stress the bees. Once the colony is settled in the new hive, give them some time to adjust before conducting any further inspections. For more insights, explore our urban beekeeping tips.
Maintaining and Managing Polystyrene Hives
Once your polystyrene hive is set up and your colony is settled, regular maintenance and management are crucial to ensure the health and productivity of your bees. This involves routine inspections, cleaning, and seasonal tasks.
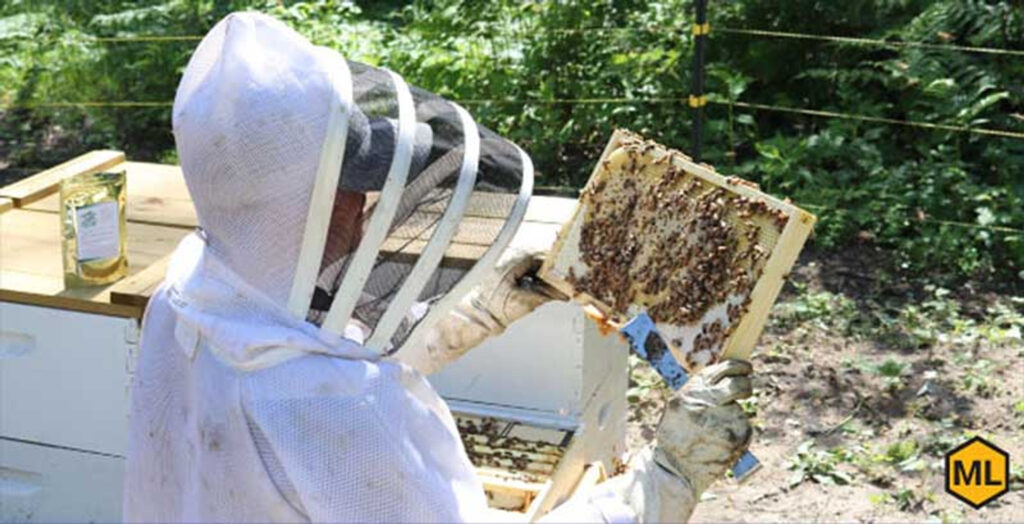
“Practical Tips for Inspecting a Beehive …” from www.mannlakeltd.com
Regular Inspection Routine
Regular inspections are essential to monitor the health of your colony and to catch any issues early. Aim to inspect your hive every 7-10 days during the active season. Here’s what you should look for:
Queen Health: Ensure the queen is present and laying eggs. Look for a healthy brood pattern.
Pest and Disease Check: Look for signs of pests like varroa mites and symptoms of diseases such as foulbrood.
Honey and Pollen Stores: Check if the bees have enough food stores. If not, consider supplemental feeding.
Hive Condition: Inspect the hive structure for any damage or wear and tear.
By keeping a close eye on these aspects, you can ensure that your colony remains healthy and productive throughout the season.
Cleaning and Hygiene Measures
Maintaining cleanliness and good hygiene in your polystyrene hive is crucial to prevent diseases and pests. Here are some tips to keep your hive clean:
Regular Cleaning: Remove any debris or dead bees from the hive floor regularly.
Disinfecting Tools: Always disinfect your beekeeping tools before and after use to prevent the spread of diseases.
Replacing Old Frames: Replace old or damaged frames periodically to maintain a healthy environment for your bees.
Monitoring for Mold: Polystyrene hives can sometimes develop mold. If you notice mold, clean it promptly with a mild bleach solution.
Keeping your hive clean and hygienic will go a long way in ensuring the health and longevity of your colony. For more tips on urban beekeeping, check out this beginner’s journey into urban beekeeping.
Seasonal Maintenance Tasks
Different seasons bring different challenges for beekeeping. Here’s a breakdown of what you should focus on during each season:
Spring: Conduct a thorough inspection after winter. Check for any damage and ensure the colony has enough food stores.
Summer: Monitor for pests and diseases. Ensure adequate ventilation to prevent overheating.
Fall: Prepare the hive for winter. Reduce the hive entrance to keep out pests and ensure the colony has enough food stores.
Winter: Minimize disturbances. Check periodically to ensure the hive is not exposed to excessive moisture or cold.
By staying on top of these seasonal tasks, you can help your colony thrive year-round.
Overwintering Strategies for Polystyrene Hives
Winter can be a challenging time for beekeepers, but polystyrene hives offer several advantages that can help your bees survive the colder months. Here are some strategies to ensure your hive makes it through winter.
Insulation Hacks for Cold Weather
Polystyrene hives already provide excellent insulation, but you can take additional steps to ensure your bees stay warm:
Wrap the Hive: Consider using a hive wrap for extra insulation. This can help retain heat and keep the hive warmer.
Insulate the Top: Place an insulation board on top of the inner cover to prevent heat loss from the top of the hive.
Reduce the Entrance: Use an entrance reducer to minimize cold drafts while still allowing ventilation.
These simple hacks can make a significant difference in maintaining a stable temperature inside the hive.
Humidity Control Techniques
Besides cold, excess moisture can be detrimental to your bees during winter. Here’s how to control humidity in your hive:
Use a Moisture Board: Place a moisture-absorbing board above the inner cover to absorb excess moisture.
Ventilation: Ensure the hive has adequate ventilation to prevent condensation buildup.
Monitor for Mold: Regularly check for mold and clean it promptly if found.
By controlling humidity, you can prevent mold growth and keep your bees healthy throughout the winter.
Feeding Bees During Winter
Ensuring your bees have enough food during winter is crucial for their survival. Here are some tips for winter feeding:
Check Food Stores: Regularly check if the bees have enough honey stores. If not, consider supplemental feeding.
Use Fondant or Sugar Cakes: Place fondant or sugar cakes on top of the frames for easy access by the bees.
Monitor Consumption: Keep an eye on the food consumption and replenish as needed.
Feeding your bees during winter can make a significant difference in their survival and readiness for spring.
Rooftop Beekeeping with Polystyrene Hives
Rooftop beekeeping is a growing trend, especially in urban areas. Polystyrene hives are particularly well-suited for this type of beekeeping due to their lightweight and durable nature. For more information on how to integrate beekeeping into urban settings, check out how bee-kind neighbor integration enhances urban beekeeping.
Advantages of Rooftop Beekeeping
Rooftop beekeeping offers several unique advantages: hive ventilation is often improved due to the elevated position, and urban environments provide diverse foraging opportunities for bees.
Space Utilization: Rooftops provide an excellent use of space that would otherwise be unused.
Urban Foraging: Bees in urban areas have access to a diverse range of forage, often leading to higher honey yields.
Reduced Pests: Being elevated reduces the risk of ground-level pests and predators.
These advantages make rooftop beekeeping an attractive option for urban beekeepers. For more information on creating a successful beekeeping environment, check out this guide on beekeeping success stories.
Noise and Vibration Considerations
One challenge of rooftop beekeeping is managing noise and vibrations from the building. Here’s how to mitigate these issues: proper hive ventilation can help reduce the impact of these disturbances on your bees.
Use a Stand: Place the hive on a sturdy stand to reduce vibrations from the roof.
Soundproofing: Consider adding soundproofing materials around the hive to minimize noise disturbances.
Monitor Bee Behavior: Keep an eye on the bees’ behavior. If they seem agitated, it may be due to noise or vibrations.
By addressing these considerations, you can create a more stable and comfortable environment for your bees.
Ensuring Adequate Forage for Bees
Foraging is crucial for the health and productivity of your bees. Here’s how to ensure they have enough forage in an urban environment:
Plant Bee-Friendly Plants: Encourage rooftop gardens with bee-friendly plants to provide additional forage.
Collaborate with Neighbors: Work with neighbors to plant flowers and shrubs that attract bees.
Monitor Forage Availability: Keep an eye on the availability of forage throughout the season and supplement if needed.
Ensuring adequate forage will help your bees thrive and produce more honey.
Troubleshooting Common Issues
Even with the best preparation and care, you might encounter some issues with your polystyrene hive. Here’s how to troubleshoot common problems to keep your colony healthy and productive. For additional guidance, check out this quick fixes for common problems.
Dealing with Pest and Disease
Pests and diseases can pose significant threats to your bees. Regular inspections and proactive measures are key to keeping your hive healthy. Here are some common pests and diseases to watch out for:
Varroa Mites: These are small, parasitic mites that can devastate a colony. Use a screened bottom board to monitor mite levels and consider chemical or natural treatments if infestation levels are high.
Wax Moths: Wax moths can damage the comb and weaken the colony. Keep your hive strong and healthy, as strong colonies can fend off these pests.
Nosema: This is a fungal disease that affects the digestive system of bees. Ensure good ventilation and hygiene practices to prevent this disease.
Regular monitoring and early intervention can help you manage these threats effectively.
Identifying and Addressing Structural Problems
Polystyrene hives are durable, but they can still encounter structural issues over time. Here’s how to identify and address common problems:
Cracks and Breaks: Inspect your hive regularly for any cracks or breaks. Small cracks can be repaired with polystyrene-safe adhesives.
UV Damage: Prolonged exposure to sunlight can degrade polystyrene. Consider painting the exterior with a UV-resistant paint to protect it.
Loose Fittings: Check that all parts of the hive fit securely. Tighten any loose fittings and replace damaged components as needed.
Addressing these issues promptly will help maintain the integrity and longevity of your hive. For more information on polystyrene hives vs wooden hives, visit Beesource Beekeeping Forums.
Managing Swarms Effectively
Swarms are a natural part of a bee colony’s lifecycle, but they can be challenging to manage. Here are some tips to handle swarming:
Monitor Swarm Indicators: Regularly inspect your hive for signs of swarming, such as queen cells or a congested brood nest.
Create More Space: Add additional supers to give the bees more space and reduce overcrowding.
Split the Hive: If you notice swarm indicators, consider splitting the hive to create a new colony and reduce the likelihood of swarming.
By staying vigilant and proactive, you can manage swarming and maintain a healthy colony. For more information on beekeeping, check out our article on navigating hive law for city beekeepers.
Frequently Asked Questions (FAQ)
Here are some common questions about polystyrene hives, along with detailed answers to help you make informed decisions. For more insights, check out our urban beekeeping beginner’s guide.
Are Polystyrene Hives Safe for Bees?
Yes, polystyrene hives are safe for bees. They provide excellent insulation, which helps maintain a stable internal temperature. This can reduce stress on the bees and improve their overall health and productivity. Additionally, polystyrene hives are resistant to pests and diseases, further protecting your colony.
How Long Do Polystyrene Hives Last?
Polystyrene hives are durable and can last for many years with proper care. On average, a well-maintained polystyrene hive can last between 10 to 20 years. Regular inspections, timely repairs, and protective measures such as UV-resistant paint can extend the lifespan of your hive.
Can Polystyrene Hives be Repaired?
Yes, polystyrene hives can be repaired if they sustain damage. Small cracks and breaks can be fixed using polystyrene-safe adhesives. For more significant damage, you may need to replace the affected parts. Regular maintenance and prompt repairs can help keep your hive in good condition.
What Are the Best Practices for Hive Ventilation?
Proper ventilation is crucial for maintaining a healthy hive environment. Here are some best practices for ventilating your polystyrene hive:
Use a Screened Bottom Board: This helps improve airflow and reduce moisture buildup inside the hive.
Install Ventilation Holes: Consider adding small ventilation holes near the top of the hive to allow warm, moist air to escape.
Avoid Blocking the Entrance: Ensure the hive entrance remains unobstructed to allow for natural ventilation.
These practices will help maintain a healthy and comfortable environment for your bees.
Are Polystyrene Hives Environmentally Friendly?
Polystyrene hives have both environmental benefits and drawbacks. On the positive side, they are long-lasting and require less frequent replacement than wooden hives, reducing resource consumption. Additionally, their superior insulation can lead to healthier and more productive colonies. For more sustainable practices, consider these expert insights on mason bee conservation.
However, polystyrene is a type of plastic, and its production and disposal can have environmental impacts. To mitigate this, consider recycling your polystyrene hive components at the end of their lifespan and explore eco-friendly disposal options.
By weighing the benefits and drawbacks, you can make an informed decision about using polystyrene hives in your beekeeping practice.




Leave a Reply