
Key Takeaways
Using an electric honey extractor speeds up the harvesting process and reduces physical effort.
Harvest honey when at least 80% of the comb is capped to ensure quality.
Essential tools include a bee suit, hive tool, uncapping knife, and honey extractor.
Uncapping the honeycombs properly is crucial for efficient extraction.
Keeping your workspace clean and organized ensures a smoother honey harvesting experience.
Step-by-Step Honey Harvesting Process: Electric Extractor Guide & Tips
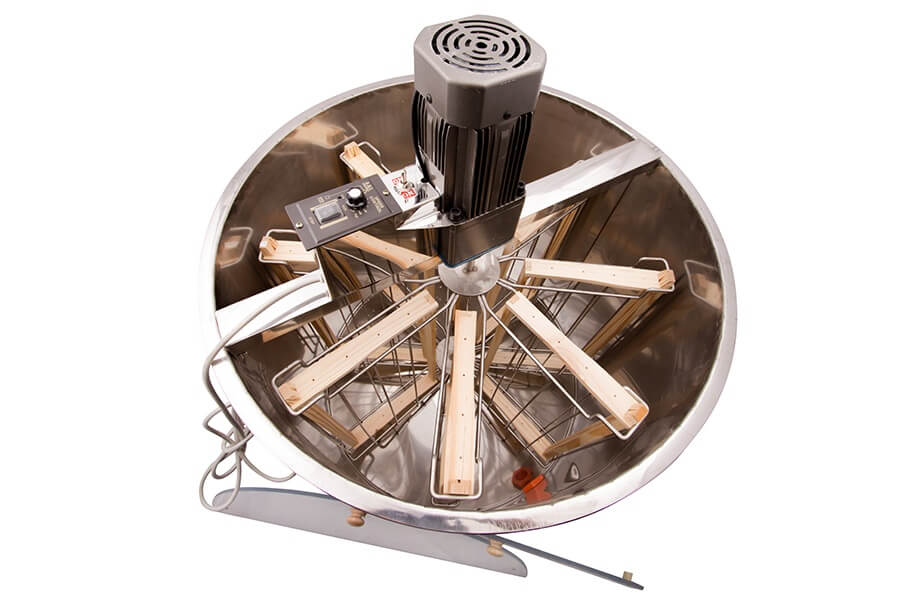
“S/steel 8 frame Electric Honey …” from beeequipments.com
Harvesting honey is one of the most rewarding aspects of beekeeping. It’s the moment when you can finally enjoy the fruits of your labor and the hard work of your bees. This guide will walk you through each step of the honey harvesting process using an electric extractor, ensuring you get the most out of your honey while keeping your bees healthy and happy.
Essential Equipment for Honey Harvesting
Before diving into the honey extraction process, it’s important to gather all the necessary equipment. Having the right tools on hand will make the process smoother and more efficient. Here’s what you’ll need:
Bee suit: Protects you from stings while working with the hive.
Hive tool: Helps you pry apart frames and remove honey supers.
Uncapping knife: Used to remove the wax cappings from the honeycombs.
Honey scraper: An alternative tool for uncapping honeycombs.
Electric honey extractor: Spins the frames to extract honey efficiently.
Bottling equipment: Containers and strainers for filtering and storing honey.
Why Use an Electric Extractor?
An electric honey extractor is a game-changer for beekeepers. Unlike manual extractors, which require physical effort to spin the frames, electric extractors use a motor to do the work for you. This not only saves time but also reduces strain on your body. Besides that, electric extractors often have variable speed settings, allowing you to control the extraction process more precisely.
Using an electric extractor also helps preserve the honeycomb structure. Because the extraction process is gentler, the combs can be returned to the hive, reducing the bees’ workload in rebuilding them. This sustainable approach benefits both you and your bees in the long run. For a detailed guide, check out this step-by-step guide for harvesting honey.
Preparing Your Hive for Honey Harvesting
Before you can start extracting honey, you need to prepare your hive. This involves determining the right time to harvest, gathering the necessary equipment, and carefully removing the honey supers.
When to Harvest Honey
Timing is crucial when it comes to harvesting honey. You should wait until at least 80% of the honeycomb is capped. Bees cap the cells with wax once the honey is ready, indicating that it has the right moisture content. Uncapped honey can ferment due to its higher moisture content, which would spoil your harvest.
Most importantly, always ensure that your bees have enough honey left for their own needs. A good rule of thumb is to leave at least 20-30 pounds of honey in the hive, especially if you’re harvesting late in the season.
Equipment Needed for Hive Preparation
To prepare your hive for honey harvesting, you’ll need the following equipment:
Bee suit and gloves: Essential for protection against stings.
Hive tool: Useful for prying apart frames and honey supers.
Smoker: Helps calm the bees, making them easier to work with.
Brush or bee blower: Used to gently remove bees from the frames.
Removing Honey Supers
Once you’ve gathered your equipment, it’s time to remove the honey supers from the hive. Here’s how to do it: Extracting Honey
Wear your bee suit and gloves to protect yourself from stings.
Use the smoker to calm the bees. Puff a few gentle smokes at the hive entrance and under the lid.
Carefully open the hive using the hive tool. Gently pry apart the frames to avoid disturbing the bees too much.
Lift the honey super off the hive. Be cautious, as it can be quite heavy when filled with honey.
Brush or blow the bees off the frames and place the frames in a designated area for extraction.
Inspecting Frames
Before extracting the honey, inspect each frame to ensure it’s ready for harvesting. Look for the following signs:
The honeycomb is mostly capped with wax.
The honey is clear and free of debris.
The frame is not damaged or moldy.
If the frames meet these criteria, they’re ready for extraction. If not, return them to the hive and check again later.
Extracting Honey from Frames

“VEVOR Manual 4 Frame Honey Extractor …” from m.youtube.com
Now that you’ve prepared your hive and inspected the frames, it’s time to extract the honey. This process involves uncapping the honeycombs and using the electric extractor to spin out the honey.
Uncapping the Honeycombs
Uncapping is the process of removing the wax seals from the honeycomb cells, allowing the honey to flow out during extraction. Here’s how to do it:
Set up a clean, designated area for uncapping. Lay down a tarp or plastic sheet to catch any drips.
Use an uncapping knife or honey scraper to gently slice off the wax caps. Hold the frame at an angle to make the process easier.
Collect the wax cappings in a separate container. These can be melted down and used for other purposes, such as making candles or lip balm.
Ensure both sides of the frame are fully uncapped before moving on to the next step.
Uncapping can be a bit messy, so take your time and work carefully to avoid wasting honey.
Uncapping can be a bit messy, so take your time and work carefully to avoid wasting honey.
Types of Uncapping Tools
There are several tools available for uncapping honeycombs, each with its own advantages:
Uncapping Knife: This heated knife slices through the wax caps smoothly. It’s ideal for large-scale operations as it speeds up the process.
Honey Scraper: A simpler, manual tool that scrapes off the wax caps. It’s perfect for hobbyist beekeepers with a few hives.
Uncapping Fork: This tool has multiple prongs and is useful for getting into the corners of the frames.
Choose the tool that best suits your needs and the scale of your beekeeping operation.
Using the Electric Extractor
With the frames uncapped, it’s time to use the electric extractor. This device will spin the frames, using centrifugal force to extract the honey. Follow these steps for a successful extraction:
Setting Up the Extractor
Setting up your electric extractor properly is crucial for a smooth extraction process. Here’s how to do it: Make sure to follow best practices, similar to those outlined in our Langstroth hive setup guide, to ensure everything runs smoothly.
Place the extractor on a stable, level surface to prevent it from tipping over during use.
Ensure the extractor is clean and free of any debris from previous extractions.
Plug the extractor into a power source and check that the motor and speed settings are functioning correctly.
Position a container or bucket under the extractor’s spout to collect the honey as it flows out.
Double-check everything before you start to avoid any mishaps during extraction.
Loading Frames into the Extractor
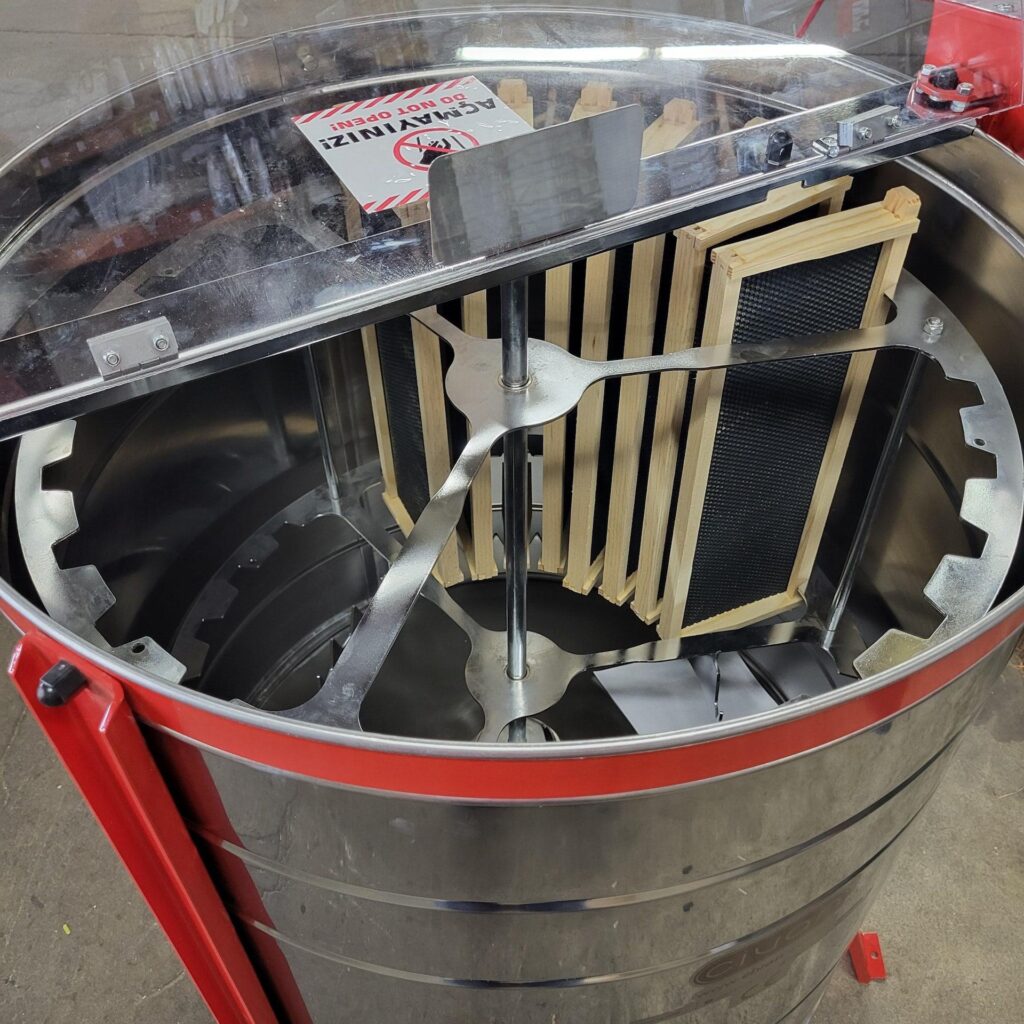
“Civan Electric 24 Frame Honey Extractor …” from www.foxhoundbeecompany.com
Loading the frames into the extractor correctly ensures an even and efficient extraction. Here’s what to do:
First, make sure the frames are properly uncapped. Then, place the frames into the extractor’s baskets or slots. Most extractors are designed to hold multiple frames at once, so load as many as it can accommodate without overcrowding.
Ensure the frames are balanced within the extractor. Unevenly distributed frames can cause the extractor to wobble or vibrate excessively, which can be dangerous and inefficient.
Spinning the Extractor
Once the frames are loaded, it’s time to spin the extractor. Here’s how to do it:
Close the extractor lid securely to prevent any honey from splashing out.
Start the extractor at a low speed to gently begin the extraction process. Gradually increase the speed to ensure all the honey is spun out.
Monitor the extraction process and adjust the speed as necessary. Most electric extractors have variable speed settings, allowing you to control the process.
Once one side of the frames is empty, stop the extractor, flip the frames, and repeat the process for the other side.
Spinning the extractor at the right speed and for the right amount of time ensures you get the maximum amount of honey from each frame.
Collecting the Extracted Honey
After spinning the extractor, it’s time to collect the honey. For beginners, understanding the entire process can be easier with a comprehensive beekeeping guide. Here’s how:
Place a fine mesh strainer or cheesecloth over the container or bucket positioned under the extractor spout. This will filter out any wax particles or debris from the honey. Open the spout and let the honey flow into the container.
Collecting the honey immediately after extraction ensures it remains fresh and free from contaminants. Once all the honey is collected, you can move on to the filtering and bottling process.
Filtering and Bottling the Honey
Filtering and bottling the honey are the final steps in the harvesting process. Properly filtered and bottled honey ensures a high-quality product that’s ready for consumption or sale.
Filtering Techniques
Filtering honey removes any remaining wax particles or impurities. Here are some effective filtering techniques:
Fine Mesh Strainer: Place a fine mesh strainer over your collection container to filter out larger particles.
Cheesecloth: For finer filtration, use multiple layers of cheesecloth. This will catch even the smallest particles.
Double Filtering: For ultra-clear honey, consider double filtering. First, use a coarse strainer to remove larger debris, then pass the honey through a finer filter.
Choose the filtering method that best suits your needs and the clarity you desire in your final product.
Bottling the Honey
Once filtered, it’s time to bottle the honey. Follow these steps:
Use clean, sterilized jars or bottles to prevent contamination.
Pour the filtered honey into the containers, leaving a small gap at the top to allow for expansion.
Seal the containers tightly to keep the honey fresh.
Bottling your honey properly ensures it remains fresh and ready for use whenever you need it.
Labeling and Storing Honey
Proper labeling and storage are essential for keeping your honey in optimal condition. Here’s what to do:
Labeling: Clearly label each container with the date of extraction and the type of honey (if applicable). This helps you keep track of your harvest and ensures you use the oldest honey first.
Storage: Store the honey in a cool, dark place to preserve its quality. Avoid exposing it to direct sunlight or extreme temperatures.
Following these steps will help you maintain the quality and flavor of your honey for months to come.
Tips for Successful Honey Harvesting
Keep your workspace clean and organized to prevent contamination.
Wear protective gear to avoid stings and stay safe.
Monitor your bees’ health and ensure they have enough honey for their own needs.
Record your harvest data to track your progress and improve future harvests.
Be patient and take your time to ensure a high-quality product.
By following these tips and the step-by-step guide, you’ll be well on your way to a successful honey harvest using an electric extractor. For more information, check out this beekeeping guide for beginners. Happy beekeeping!
Ensuring Bee Safety
It’s important to prioritize the safety and well-being of your bees during the harvesting process. Here’s how:
Use a smoker to calm the bees and make them easier to work with.
Handle the frames gently to avoid disturbing the bees too much.
Leave enough honey in the hive to sustain the bees through the season.
Monitor the hive’s health regularly to catch any potential issues early.
Ensuring the safety of your bees helps maintain a healthy and productive hive. For more tips, check out this Italian honeybee beekeeping guide.
Recording Harvest Data
Keeping detailed records of your honey harvests can help you track your progress and make improvements in the future. Here’s what to record:
The date of each harvest.
The amount of honey extracted.
The condition of the frames and hive.
Any observations about the bees’ behavior or health.
Recording this data helps you identify patterns and make informed decisions about your beekeeping practices.
Conclusion: Embracing the Honey Harvesting Process
Harvesting honey with an electric extractor is a rewarding and efficient process. By following this step-by-step guide, you can ensure a successful harvest while keeping your bees healthy and happy. Remember to gather all the necessary equipment, prepare your hive properly, and take your time during each step of the extraction process.
Most importantly, enjoy the experience and the fruits of your labor. There’s nothing quite like the taste of fresh, home-harvested honey. Happy beekeeping!
Frequently Asked Questions (FAQ)
What is the best time of year to harvest honey?
The best time to harvest honey is typically late summer to early fall. This is when the bees have had enough time to gather nectar and convert it into honey. However, the exact timing can vary depending on your location and the specific conditions of your hive.
How often should I clean my electric extractor?
It’s important to clean your electric extractor after each use. This prevents any leftover honey from crystallizing and ensures the extractor remains in good working condition. Regular cleaning also helps maintain the quality of your honey.
Can I harvest honey without an electric extractor?
Yes, you can harvest honey without an electric extractor. Manual extractors and crush-and-strain methods are alternative options. However, an electric extractor is more efficient and less labor-intensive, especially if you have multiple hives.




Leave a Reply