
As we embark on this DIY journey, let’s start by understanding why inviting mason bees into our gardens is not just a delightful project but a crucial step towards a thriving ecosystem. These non-aggressive pollinators are vital for plant diversity and food production. Building a mason bee house is a simple way to give back to nature and watch your garden flourish.
Key Takeaways
Mason bees are exceptional pollinators, making them essential for a healthy garden.
Creating a mason bee house can be done with simple, often recycled materials.
The proper placement of a bee house is crucial for attracting mason bees.
Maintaining a mason bee habitat is easy and requires minimal effort.
By building a mason bee house, you’re contributing to biodiversity and helping the environment.
Why Mason Bees Matter for Your Garden

“Mason Bees & Blue Orchard Bees …” from eslt.org
Mason bees might not produce honey, but they are superheroes when it comes to pollination. These solitary bees are incredibly efficient at transferring pollen between flowers, ensuring that your garden not only looks beautiful but is also productive. Plus, they’re gentle and rarely sting, making them perfect garden companions, especially for families with curious kids.
Meet the Mason Bee: A Pollinator Powerhouse
Mason bees are named for their unique nesting habit of using mud to construct their homes. Unlike honeybees, they don’t live in hives but prefer individual holes where they can lay their eggs. Each female is a queen and does her own foraging, which means every mason bee in your garden is a pollinator.
The Role of Mason Bees in Promoting Biodiversity
By encouraging mason bees to visit your garden, you’re supporting local biodiversity. These bees are native to North America and play a crucial role in the pollination of wildflowers, fruits, and vegetables. As they move from flower to flower, they’re not just helping your plants; they’re also supporting the wider ecosystem.
Gathering Your Materials
Before we dive into the construction, let’s talk about what you’ll need. The beauty of building a mason bee house is that it doesn’t require fancy materials or tools. In fact, you can repurpose items that you might otherwise throw away, making this project as eco-friendly as it is enjoyable.

Natural and Recycled Supplies
When selecting materials for your mason bee house, natural and untreated items are the way to go. Mason bees are attracted to materials that mimic their natural habitat. This can include untreated wood, bamboo, or even cardboard tubes. Avoid treated wood or plastic, as these can deter bees or even harm their health.
Shopping List: Items You’ll Need to Start
Untreated wooden blocks or logs
Bamboo tubes or paper straws
Non-toxic, water-resistant wood glue
Drill with a variety of bits (for wooden blocks)
Mounting hardware to secure the house
Building Your Mason Bee House
Now, let’s roll up our sleeves and start building. The process is straightforward, and the end result is a functional and stylish addition to any garden. Remember, precision isn’t as important as functionality; mason bees aren’t picky about aesthetics.
Step 1: Preparing the Structure
“Beehive planter – outdoor vase” from www.capital-garden.com
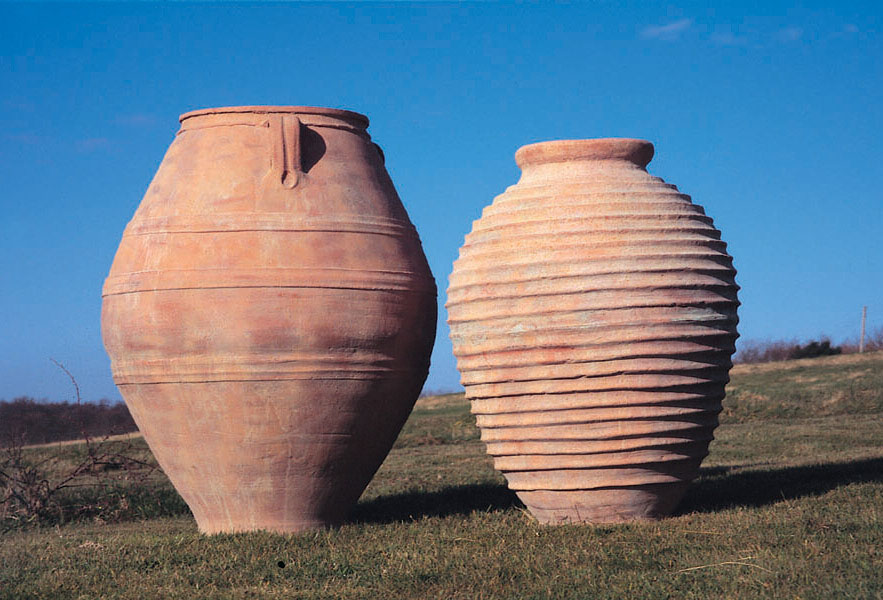
Choose a container that will act as the outer shell of your bee house. This could be a wooden birdhouse, an old coffee can, or even a terra cotta pot. The key is to ensure that it’s sturdy and can protect the nesting tubes from the elements.
For example, if you’re using a terra cotta pot, you’ll want to plug the drainage hole at the bottom to prevent moisture from getting in. A simple piece of wood or a cork can do the trick.
Next, if you’ve opted for a wooden block or log, you’ll need to drill holes into it to create the nesting sites. The holes should be about 5/16 of an inch in diameter, which is the perfect size for mason bees, and at least 3 to 6 inches deep. Space the holes about 3/4 of an inch apart.
Step 2: Rolling the Nesting Tubes
If you’re not using pre-made bamboo tubes or paper straws, you can make nesting tubes from scratch. Take a sheet of untreated paper and roll it tightly around a pencil or dowel until it’s about the diameter of a pencil. Secure it with a dab of non-toxic glue. The length should be around 6 inches, which is ideal for the bees to lay a sequence of eggs.
Step 3: Constructing the Interior
Once you have your nesting tubes ready, it’s time to arrange them inside the container. If you’re using a wooden block with pre-drilled holes, this step is already done. However, if you’re using a container like a pot or can, pack the tubes in tightly so they don’t jostle around. The back of the tubes should be closed off, so the bees feel secure. You can use a piece of untreated wood or even a lump of clay to seal the end. For more details on constructing a bee-friendly habitat, you can refer to this guide to DIY mason bee houses.
Step 4: Sealing and Protecting Your Bee Abode
“Bee Houses for Native Solitary Bees …” from www.almanac.com
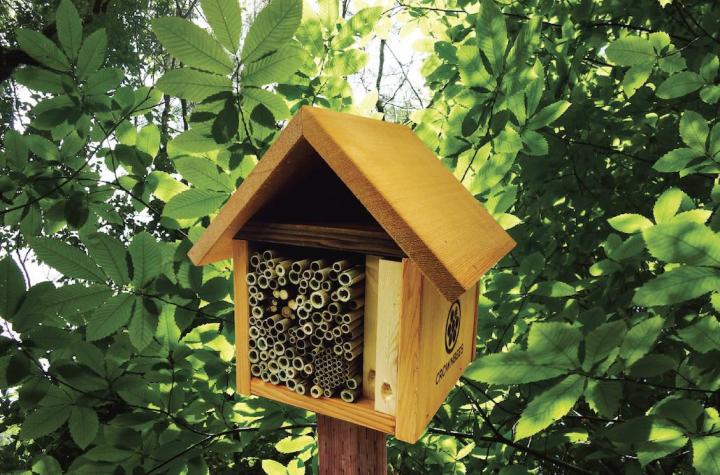
To ensure that your mason bee house stands the test of time, it’s important to protect it from the weather. If you’re using a wooden structure, you can apply a coat of natural, non-toxic sealant to the outside. Make sure the entrance to the tubes remains unobstructed. You can also attach a small roof or overhang to provide additional protection from rain.
Apply a non-toxic sealant to the exterior of the wooden structure.
Ensure nesting tube entrances are clear for bees to access.
Consider adding a roof or overhang to shield from precipitation.
With the construction complete, it’s time to find the perfect spot in your garden for your new mason bee house.
Placing the Bee House in Your Garden
Location is everything when it comes to encouraging mason bees to move in. The house should be placed facing east or southeast to catch the morning sun, which helps the bees warm up and start their day. It should be mounted at eye level, between 4 and 7 feet off the ground, and firmly secured so it doesn’t sway in the wind.
Choosing the Perfect Spot
When scouting locations, look for an area that’s protected from harsh winds and isn’t too close to bird feeders or baths, as birds can be predators of mason bees. A spot near a wall, fence, or dense vegetation can offer the shelter the bees need.
Face the bee house east or southeast to catch the morning sun.
Mount at eye level, between 4 and 7 feet high.
Avoid placing near bird feeders to protect bees from predators.
Ensuring Accessibility for Your Buzzing Tenants
Accessibility is crucial for mason bees. Make sure there’s a clear flight path to the entrance of the bee house. Avoid overcrowding the area with plants or other obstacles. It’s also a good idea to have a source of mud nearby, as mason bees use it to build their nests. A simple dish of damp soil or clay can work wonders.
Welcoming Mason Bees to Your Yard
With the bee house in place, the next step is to make your yard inviting. Mason bees are more likely to stay if there’s a readily available food source. This means planting a variety of flowers that bloom at different times, ensuring a consistent supply of nectar and pollen.
When selecting plants, opt for native species whenever possible. These are the plants that local bees are most adapted to and will provide the best nutrition. Consider the following:
Attracting Bees with the Right Flowers
Choose a mix of early, mid-season, and late-blooming plants to provide food throughout the bee season. Early bloomers like crocuses and snowdrops are perfect for mason bees emerging in the spring. Mid-season flowers such as foxgloves and lavender will sustain them through the summer, and late bloomers like asters keep them fed in the fall.
For example, a garden with a succession of blooms from crocuses in early spring to asters in late fall will ensure that mason bees have a consistent food source.
Maintaining the mason bee house is straightforward. Keep an eye out for signs of wear or damage and repair as needed. After the bees have finished nesting, usually by late fall, you can remove the tubes, open them to harvest the cocoons, clean out any debris, and then store the cocoons in a cool, dry place until the next spring.
By following these steps, you’re not just building a bee house; you’re building a sanctuary for one of nature’s most industrious creatures. And as they buzz from flower to flower, they’ll be doing more than just making your garden grow—they’ll be playing a part in the health of the environment as a whole.
Maintaining the Mason Bee House
Once your mason bee house is bustling with activity, it’s important to maintain it to ensure your bees are safe and happy. The good news is, mason bees are low maintenance. Here’s what you need to do:
Regularly check the house for any signs of damage or wear, especially after severe weather conditions.
Look out for parasites or predators that may harm the bees or their larvae, such as wasps or birds.
At the end of the season, usually in late fall, you can clean out the bee house. Carefully open the tubes, harvest the cocoons, and store them in a cool, dry place over winter.
By spring, you’ll be ready to reintroduce the cocoons back into the bee house, giving the next generation of mason bees a head start.
FAQ
Now that we’ve covered the basics of building and maintaining a mason bee house, you might have some questions. Here are answers to some of the most commonly asked questions, including tips on maintaining your bee house.
What makes mason bees different from honeybees?
Mason bees are solitary bees, meaning they don’t live in hives and work independently. They are also non-aggressive and do not produce honey. Their main focus is on pollinating plants, and they are incredibly efficient at it. Each female mason bee does the work of multiple honeybees when it comes to pollination.
How long does it take for bees to start using the house?
Be patient—sometimes it can take a season or two for mason bees to discover your bee house. However, if you’ve placed it correctly and have a variety of flowering plants nearby, you might see occupants move in during the first spring or summer after setting up your bee house.
What’s the best time of year to set up a bee house?
The best time to set up a bee house is in the late winter or early spring, just before the mason bees become active. This gives them time to find the house and start using it as soon as they emerge.
Do mason bee houses require cleaning?
Yes, it’s a good idea to clean your mason bee house once a year. After the bees have finished nesting and the larvae have spun their cocoons, usually by late fall, you can clean out the tubes. This helps prevent the spread of parasites and diseases.
Can I build multiple bee houses in my garden?
Absolutely! Having multiple bee houses can attract more bees and help with pollination. Just make sure to space them out in your garden to give each bee plenty of foraging opportunities.
In conclusion, building a DIY mason bee house is a fun and rewarding project that benefits both your garden and the environment. By following the steps outlined in this tutorial, you’ll create a safe haven for these vital pollinators. Remember to use natural materials, place the house in a sunny, sheltered location, and maintain it with care. Happy building, and may your garden buzz with the sounds of busy mason bees!



Leave a Reply