Key Takeaways
-
Discover the importance of bees and how native prairie flowers support their populations.
-
Learn how to plan and prepare your space for a thriving bee sanctuary.
-
Understand the secrets behind seed stratification to ensure successful germination.
-
Get practical tips on planting techniques for native prairie flowers.
-
Find out how to care for your bee-friendly garden throughout the seasons.
Why Native Prairie Flowers are Bees’ Best Friends

Imagine a garden that buzzes with life, where bees flit from blossom to blossom, and the air is sweet with the scent of wildflowers. This isn’t just a dream; it’s the reality we can create by planting native prairie flowers. These plants are not just beautiful—they’re a lifeline for bees, providing them with the nectar and pollen they need to survive and thrive.
But why focus on native species? It’s simple: they’re perfectly adapted to the local climate and soil, which means they’re hardier and require less maintenance than non-native plants. Plus, they’ve evolved alongside local bees, forming a symbiotic relationship that’s as old as the prairie itself.
Most importantly, by planting native prairie flowers, you’re contributing to the health of our ecosystem. Bees are crucial pollinators, and without them, many of the fruits and vegetables we love would be scarce. So, let’s roll up our sleeves and turn our gardens into sanctuaries for these essential creatures.
The Vital Role of Bees in Our Ecosystem
Bees are the unsung heroes of the ecosystem, pollinating a third of the food crops we consume. Their role extends beyond our plates, though. They also pollinate the plants that many wild animals rely on for food and shelter. Without bees, our natural world would be a much less vibrant and fruitful place.
Native Prairie Flowers: A Buffet for Pollinators
Native prairie flowers are more than just eye candy for us gardeners; they’re a veritable feast for bees. From the bright splashes of purple coneflowers to the sunny faces of black-eyed Susans, these plants offer a diverse menu for our pollinating pals. And because they’re adapted to the local environment, they’re less susceptible to pests and diseases, which means they’re healthier for bees, too.
Planning Your Bee Sanctuary

So, you’re ready to transform your garden into a bee paradise? The first step is planning. You’ll want to consider the location, the size of your garden, and the types of native prairie flowers that will thrive in your area. It’s like setting the table before a feast—it’s all about preparation.
Start by observing your space. How much sunlight does it get? What’s the soil like? Is it sandy or clay-heavy? These factors will determine which flowers will bloom best in your sanctuary. And remember, size doesn’t limit you; even a small patch can become a bustling bee haven.
-
Assess the sunlight: Full sun is best for most prairie flowers.
-
Check your soil: Well-draining soil mimics the prairie environment.
-
Plan for variety: Include flowers that bloom at different times to provide a continuous food source.
Next, it’s time to select the right seeds. You’ll want to choose a mix of species that will provide blooms throughout the growing season. Early bloomers like wild lupine and lanceleaf coreopsis kick off the spring, while late-season stars like New England aster and goldenrod close out the fall. This staggered blooming schedule ensures that bees have a consistent source of food.
Assessing Your Space: Sunlight, Soil, and Size
Every garden is unique, and that’s the beauty of it. Take a walk around your space at different times of the day to see where the sun lingers the longest. This spot is prime real estate for your prairie flowers. Next, get up close and personal with your soil. If it’s compacted, consider amending it with organic matter to improve drainage and mimic the prairie’s fertile ground.
Selecting the Right Seeds: A Seasonal Approach
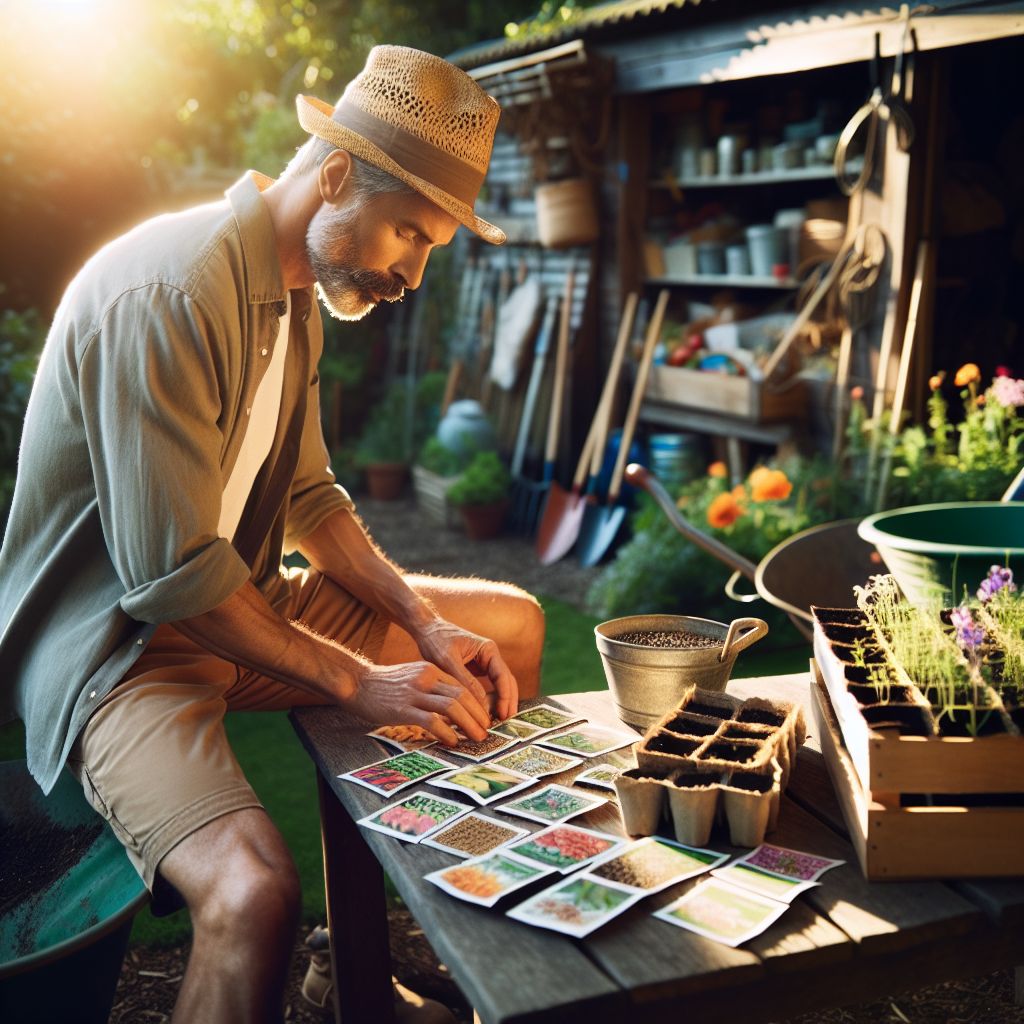
When you’re picking out seeds, think about the entire growing season. You want a succession of blooms, from the first warm days of spring to the cool onset of fall. This means mixing early, mid-season, and late-blooming plants. Your local extension office or a native plant nursery can help you choose the right varieties for your area.
For example, in spring, you might see bees buzzing around wild indigo, while in summer, they’ll be all over purple prairie clover. And when autumn rolls around, your asters will be the talk of the insect world.
Seed Prep and Planting Primer
Now, let’s talk about getting those seeds ready to plant. Many native prairie seeds need a little help to break their dormancy, a process called stratification. It’s like waking them up from a deep sleep so they’re ready to grow when the warmth of spring arrives.
Stratification: The Cold Treatment Secret
Stratification is a fancy term for a simple process: giving your seeds a chill. Most native prairie seeds need a period of cold, moist conditions to germinate effectively. You can mimic this naturally occurring process by putting your seeds in a moist medium like sand or vermiculite and then storing them in the refrigerator for several weeks. For more detailed guidance, see this resource on growing native plants from seed.
It’s like making a mini winter for your seeds right inside your fridge. After their cold treatment, they’ll be raring to grow when you plant them.
Sowing Strategies: Scatter, Bury, or Press?
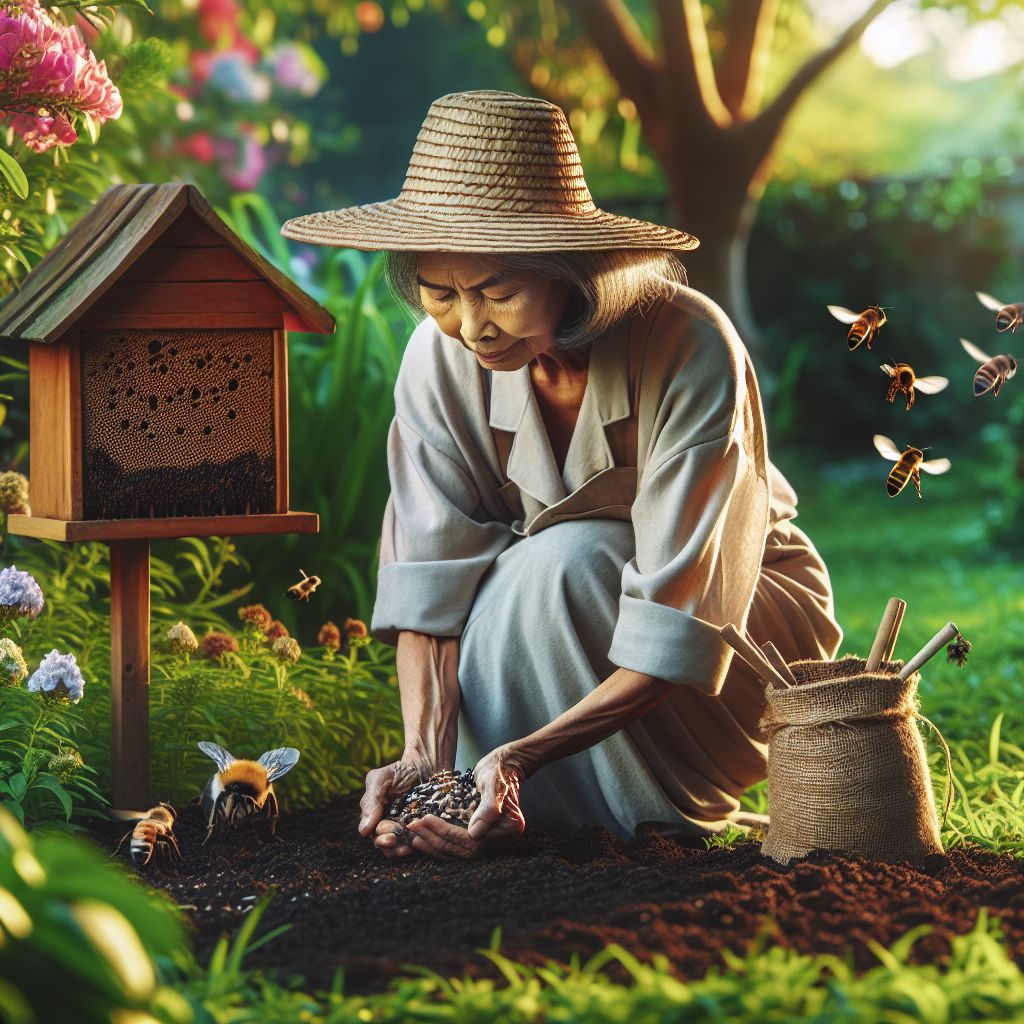
With your seeds stratified, you’re ready to plant. But what’s the best way to do it? There are a few methods you can use, and each has its own benefits. You could scatter the seeds on the soil surface, which is quick and easy. Some seeds need light to germinate, so this method works well for them. Alternatively, you could bury the seeds lightly, which helps to protect them from being eaten by birds or carried away by the wind. Or you could press them into the soil, ensuring good contact between seed and soil, which can improve germination rates. Whichever method you choose, make sure to keep the area moist until the seeds germinate and the seedlings are well-established.
Here’s a quick rundown:
-
Scatter: Best for seeds that need light to germinate or for creating a natural look.
-
Bury: Good for larger seeds that need darkness to sprout.
-
Press: Ideal for ensuring soil contact, especially in windy areas.
Remember, patience is key. Native prairie seeds can be slow to germinate, so don’t worry if you don’t see sprouts right away. Just keep the faith and maintain a consistent watering schedule.
Caring for Your Growing Sanctuary
Once your seeds have sprouted, it’s time to nurture them into flourishing plants. This stage is all about providing the right conditions for growth without overdoing it. Native prairie plants are accustomed to the natural ebb and flow of the prairie environment, so they don’t need as much babysitting as other garden plants might. However, they do need some attention to ensure they establish well.
One of the most important things to remember is that these plants are adapted to the prairie’s occasional droughts, which means they’re more tolerant of dry conditions than you might think. Overwatering can be just as harmful as underwatering, so it’s crucial to find that sweet spot.
Watering Wisdom: Tips for Healthy Hydration
When it comes to watering your native prairie garden, think like a rain cloud. Provide deep, infrequent waterings that mimic natural rainfall. This encourages deep root growth, which helps plants withstand drought. As a general rule, aim for about an inch of water per week, whether from rainfall or your hose. If you’re not sure whether to water, check the soil a few inches down. If it’s dry, it’s time to water; if it’s moist, hold off.
Here’s a quick guide to watering wisely:
-
Water early in the morning to reduce evaporation.
-
Use a soaker hose or drip irrigation to deliver water directly to the roots.
-
Avoid overhead watering, which can promote fungal diseases.
And don’t forget to mulch. A layer of organic mulch can help conserve moisture, suppress weeds, and provide a slow release of nutrients.
“The right amount of water can make all the difference. It’s not just about keeping plants alive; it’s about helping them thrive.”
Weed Warfare Without Harming Bees
Weeds can be a major competitor for your native flowers, stealing precious resources like sunlight, water, and nutrients. However, it’s crucial to tackle weeds in a way that doesn’t harm bees or other beneficial insects. Avoid chemical herbicides, which can be toxic to pollinators. Instead, opt for manual removal or use natural mulches to suppress weed growth. Pulling weeds by hand may be labor-intensive, but it’s safe for the bees and gives you a chance to get up close and personal with your plants, which can be quite therapeutic.
Signs of Success: Spotting Pollinators at Work
As your garden grows, keep an eye out for visitors. The sight of bees buzzing from flower to flower is a sign that your sanctuary is working. You might also see butterflies, hummingbirds, and other pollinators. These creatures are not just a joy to watch; they’re proof that your garden is a healthy ecosystem. Take note of which plants attract the most pollinators, as this can guide your planting decisions in the future.
Look for these signs: bee hotel maintenance is key.
-
Bees landing on flowers and moving from bloom to bloom.
-
Butterflies hovering and alighting on your plants.
-
Birds, like hummingbirds, visiting your garden for a sip of nectar.
Remember, a diverse garden is a resilient garden, so the more variety you have in your plantings, the more types of pollinators you’ll attract. For inspiration, consider creating your own pollinator paradise with a bee-friendly wildflower seed mix.
Beyond Flowers: Enhancing Bee Habitat
Flowers are just one part of creating a bee sanctuary. To really roll out the welcome mat for bees, you’ll want to provide them with nesting sites and other habitat features. Bees need places to lay their eggs and shelter from the elements. You can create these habitats by leaving some areas of your garden a little wild, with natural debris like fallen leaves and dead wood. You can also build or buy bee hotels, which offer a safe place for solitary bees to nest.
Creating Nesting Nooks: Shelters Bees Love
Creating nesting sites for bees can be as simple or as elaborate as you like. For a DIY approach, leave patches of bare soil for ground-nesting bees or pile up some dead wood for carpenter bees. You can also hang bundles of hollow stems or bamboo canes to attract solitary bees. If you’re not the DIY type, there are plenty of ready-made bee houses available that can be a charming addition to your garden.
Consider these options for bee shelters:
-
Leave a wild corner in your garden with natural debris.
-
Install a bee hotel with tubes for solitary bees.
-
Create a woodpile in a sheltered spot for carpenter bees.
Sweet Extras: Supplemental Water and Feeders
Besides nectar, bees also need water. You can provide a bee watering station by filling a shallow dish with pebbles or marbles and adding water just enough to cover the bottom. The stones give bees a place to land so they can drink without drowning. And while bees will get most of the nutrients they need from your flowers, you can also set out a bee feeder with a sugar water solution, especially in early spring when flowers are scarce.
Here’s how to set up a bee-friendly water source:
-
Use a shallow dish or birdbath.
-
Fill with clean water and pebbles or marbles.
-
Change the water regularly to prevent mosquito breeding.
With flowers to feed on, water to drink, and shelters for nesting, your garden will be a true sanctuary for bees. And that’s something you can feel good about every time you step outside and hear the gentle hum of bees at work.
As the days shorten and the air turns crisp, it’s time to prepare your bee sanctuary for the coming winter. Just as bees hunker down for the colder months, your garden needs a little extra care to ensure it emerges in spring ready to welcome back its buzzing inhabitants.
Start by cutting back dead stems and clearing out any debris. This not only tidies up your garden but also removes any hiding places for pests that could cause problems next year. However, remember to leave some areas undisturbed, as many bees and beneficial insects overwinter in the hollow stems of plants and the leaf litter.
Next, consider planting cover crops like clover or winter rye. These plants will protect your soil from erosion and add valuable nutrients when they’re turned under in the spring. They also offer a late-season food source for any bees that are still active.
Finally, mulch your perennial flowers. A layer of mulch can help regulate soil temperature, preserve moisture, and protect the roots of your plants from freezing and thawing cycles. Just be careful not to overdo it—too much mulch can smother your plants and create a haven for rodents.
Autumn Prep and Winter Wrap: Ensuring Year-Round Success
As autumn’s palette fades to winter gray, it’s essential to prepare your prairie flower sanctuary for the dormant season. Clear away the spent stalks and seed heads—though consider leaving some for birds who feast on the seeds. Add a layer of mulch to insulate the soil and protect the roots from freeze-thaw cycles. This step is crucial; it’s like tucking your garden into bed, ensuring it wakes up refreshed in the spring.
While some gardeners might be tempted to tidy up every fallen leaf, resist the urge. Those leaves provide vital shelter for overwintering pollinators and beneficial insects. Think of them as a cozy blanket, offering protection until the warmth of spring beckons the bees back to your sanctuary.
FAQs on Native Prairie Flowers and Bee Sanctuaries
Creating a bee sanctuary with native prairie flowers is a rewarding venture, but it can also raise a lot of questions. Here are answers to some of the most common queries to help you along your journey to a buzzing backyard.
Whether you’re a seasoned gardener or a green-thumbed newbie, you’re likely curious about the nitty-gritty of building a haven for bees. Don’t worry; you’re not alone in your quest for knowledge. Let’s dive into some frequently asked questions that might be buzzing through your mind.
What are the best native prairie flowers to start with?
Starting with the right flowers is key to success. Look for native species that are known to be hardy and attractive to bees. Some great choices include:
-
Purple Coneflower (Echinacea purpurea)
-
Wild Bergamot (Monarda fistulosa)
-
Black-eyed Susan (Rudbeckia hirta)
-
New England Aster (Symphyotrichum novae-angliae)
-
Goldenrod (Solidago spp.)
These plants offer a range of bloom times, colors, and shapes to keep bees coming back throughout the season.
How can you tell if your garden is bee-friendly?
A bee-friendly garden is a buzz with activity. You’ll see bees and other pollinators visiting regularly, especially on sunny days. Look for bees hovering around and landing on flowers, collecting pollen and nectar. If you see a variety of pollinators and your plants are thriving, you’re on the right track.
Moreover, a bee-friendly garden is free of pesticides and offers a variety of plants that bloom at different times, providing a continuous food source. It also includes areas for bees to nest and access to water. If your garden checks these boxes, you’re definitely bee-friendly!
Can you create a bee sanctuary in a small space?
Absolutely! Even a small balcony or patio can be transformed into a bee oasis with container planting. Choose compact varieties of native prairie flowers and provide a small water source. Remember, it’s not about the size of the space but the quality of the habitat you create.
Even a few pots filled with the right flowers can make a significant difference. Bees don’t need vast expanses to thrive; they’re happy with any supportive environment you can provide.
What if native prairie seeds don’t germinate?
If your seeds don’t sprout, don’t lose hope. First, check that they’ve been stratified properly if required. Remember, some native seeds take longer to germinate than others. If they still don’t germinate, consider the planting depth, soil conditions, and moisture levels. It might take a bit of troubleshooting, but persistence is key. And don’t hesitate to reach out to local gardening groups or extension services for advice.
Remember, native prairie seeds are survivors. They’re meant to endure tough conditions, so with a little care and attention, they’ll usually find their way.
Is it possible to have a bee sanctuary in an urban area?
Urban environments need bees just as much as rural areas, and creating a sanctuary in the city is not only possible, it’s encouraged. Rooftops, community gardens, and even window boxes can all be perfect places for urban bee sanctuaries. The key is to plant a variety of flowers that bloom at different times, providing a consistent source of food for bees. For those interested in urban beekeeping, finding the ideal rooftop bee house spot is a great starting point.
Urban gardens are incredibly important for pollinators, as they often serve as stepping stones between larger green spaces, allowing bees to navigate the concrete jungle. So go ahead, turn that city space into a pollinator paradise!
In conclusion, whether you have acres of land or just a few feet on a balcony, you have the power to make a difference for bees. By planting native prairie flowers and creating habitats for these vital pollinators, you’re contributing to the health of our ecosystem. So plant those seeds, watch your garden grow, and enjoy the buzz of life you’ve helped to nurture. With these tips and a little bit of love, your bee sanctuary will be a flourishing testament to the beauty and resilience of nature.